Showing posts with label Recipes. Show all posts

Monday, February 28, 2011

Homemade "Chicken Nuggets" and Ketchup

So my two year old is an extremely picky eater. So I'm always trying to come up with things she'll actually eat. Now I admit these take a little more effort than going through Wendy's but our kids are worth it right? Well most days anyway and today was one of those days.
Generally speaking if I'm going to this much trouble I like it to work for everyone in the family. This one does but it's not a favorite for me but do the kids ever love it. Also if they don't eat them all (which they won't) you can frig or freeze them.

So here it is:

"Chicken Nuggets"
  • 1 tbsp olive oil
  • 1 large onion, diced
  • 1 clove garlic, minced
  • 1 1/2 slices whole wheat bread
  • 3 tbsp milk
  • 1-2 chicken breasts (or ground chicken if you want to make it easier)
  • 1 small egg
  • 5 tbsp ketchup
  • 1 tsp Worcestershire sauce
  • 2 tbsp fresh parsley
  • 1/4 tsp thyme
  • 1 1/2 cups corn, fresh, frozen or otherwise (could be substituted with peas, zucchini, cauliflower, carrots whatever your kids like, corn is sweet and blends in)
  • s+p
  1. Saute onion and garlic in evoo till translucent and tender, set aside.
  2. Soak the bread in milk and tear into pieces
  3. Place chicken in a food processor or blender. Pulse for a few seconds.
  4. Add everything else but corn and blend for a few more seconds till well combine.
  5. Transfer to a bowl and stir in corn.
  6. At this point you could store this in your fridge overnight or make it immediately.
  7. Put some flour out on a plate. (You could also use bread crumbs or panko) With one hand/spoon scoop a golf ball size of chicken into flour and roll around until coated. Pat softly to remove excess flour and form into "nugget" shape.
  8. Heat veg oil in a pan over medium to medium/low heat.
  9. Make one fritter to test for seasoning and adjust.
  10. Cook about 4-5 minutes per side until cooked through.
  11. Serve with Homemade Ketchup.
Homemade Ketchup

  • 2 cans hunts tomato sauce
  • 1 (heaping) tbsp tomato paste
  • 1 tbsp balsamic vinegar
  • 1-2 tbsp dark brown sugar
  1. Put all the ingredients into a saucepan and bring to a boil.
  2. Reduce heat to medium/low and cook, uncovered for about 15 minutes.

Tuesday, November 23, 2010

Salmonella is not a good side dish.

This is the stuffing I'm making...that ironically will not be stuffed anywhere (i'm doing a half recipe because my mom is making a half batch of hers).
  • 1 1 1/2-pound loaf sliced sourdough bread with crust, small dice (I will use a few different types of bread i.e. french, sourdough, challah, whatever looks good)
  • 1 1/2 pounds sweet Italian sausages, casings removed
  • 1 1/2 pounds hot Italian sausages (I'm only using Costco's mild italian sausage. It's the best)
  • 6 cups chopped onions
  • 2 cups chopped celery
  • 3/4 cup (1 1/2 sticks) butter, divided
  • 3 pounds Pippin or Granny Smith apples, peeled, cored, cubed
  • 2 pounds parsnips, peeled, cubed
  • 3/4 cup packed fresh sage leaves
  • 1/2 cup low-salt chicken broth (I will add more or less stock depending on how dry my bread is. You want it to be pretty soggy before baking because the bread will just suck up all that moisture like a sponge).

Preparation

Preheat oven to 325°F. Bake bread cubes on 2 large rimmed baking sheets until lightly toasted, about 20 minutes. (or you can cut them and leave them to dry out over night)

Sauté sausages in very large skillet over medium-high heat until cooked through, breaking into pieces with spoon, about 15 minutes. Using slotted spoon, transfer to large bowl; add bread.

Add onions and celery to same skillet and sauté until golden brown, about 10 minutes; transfer to bowl with bread. Melt 1/4 cup butter in same skillet over medium-high heat. Add apples and sauté until tender, about 8 minutes; mix apples into stuffing. Melt 1/4 cup butter in same skillet over medium-high heat. Add parsnips and sauté until golden, about 10 minutes; mix into stuffing. Melt 1/4 cup butter in same skillet. Add sage and sauté until dark green, about 2 minutes. Mix sage and butter into stuffing. Season with salt and pepper.

Butter 15x10x2-inch glass baking dish. Stuff turkey. (You all know I'm not stuffing my turkey. Sacrilege.) Transfer remaining stuffing to prepared dish; drizzle with 1/2 cup chicken broth. Cover with foil. (Can be prepared 4 hours ahead. Cover and refrigerate.)

Preheat oven to 350°F. Bake stuffing covered until heated through, 45-60 min. Uncover and bake until beginning to brown, about 10 minutes.

Turkey Revisions and or Additions

Okay so I have a few more things to say regarding this turkey.
I've had some questions since this post and remembered somethings I forgot to mention for first time briners.

Why should I brine? How does it work? What does it do? (these types of questions)
Other than, "because I said so..."

The salt solution passes through the permeable meat cells during the soaking process using the method of osmosis. Osmosis is the diffusion of water through a semi-permeable membrane - in this case the meat cells. Through diffusion, the salt and water within the meat cells balance with the salt and water in the surrounding brine which results in a higher concentration of salt and water in the meat. Food chemists disagree about the mechanics of this diffusion and how salt travels across membranes, but at the end of the day, the diffusion results in more water and flavor within the cells of the meat. The high concentration of salt also denatures protein strands. In their normal state, the strands are tightly wound; denatured strands unwind and tangle. During cooking, this unusual structure traps water molecules and holds onto them. The end result of this osmosis is less moisture is lost during cooking.

Are you asleep yet?

In layman's terms: Salt retains water+salt invades meat = moist, flavorful turkey

A few more key points:

1. Don't stuff your turkey. I know this is a great debate and a possible deal breaker for some of you but hear me out. Other than it being a cesspool of germs, a messy pain, and a recipe for soggy stuffing, it won't work so well with this process. You miss out on the aromatics completely, it affects the cooking process, and the saltiness could affect your stuffing. Bake it in a pan. If you want it more moist (soggy like we're used to ;) add more chicken stock.

2. You must have a probe thermometer. A digital reader with a little cord attaching to a probe that can be left in during cooking. Not only is this essential to your turkey success, it's a good investment for your roasting future. You can put it in and leave it in so you're not leaving a gaping whole for juices to spill out of (don't take it out until turkey is done resting!). Also many have alarms so you don't have to wait around baby sitting your birdie.

3. When you insert the probe make sure it's in the thickest part of the breast. Not in the dark meat. Not in the cavity. If it has a pop up thermometer ignore it but don't remove it. It would just be another gaping hole for juices to escape. And I know the temperature seems low but it will keep cooking after you remove it! Trust me. That was based on a 20 lb bird so if yours is smaller, sure cook it a few more degrees. But remember you can always put it back in if it doesn't reach 165 but you can't undo what you've already done. With all of that said, don't stress! I over cooked my bird last year and it was still the juiciest we've ever had.

4. I was going to write a whole gravy post but then I happened on the pioneer woman's site and she's got a great pictured "how to" on gravy with brined turkey that shows exactly what I would've done any how, giblets and all. So hop on over there. I may just finish mine with a little brandy and cream but otherwise she's spot on.

5. Email or text me with your questions...even on thanksgiving morning and I'll walk you through it. And please, let me know how it turns out.

Tuesday, November 16, 2010

Let's Talk Turkey

I'm just going to come out and say with no false modesty that I make the most amazing turkey on the face of the earth. I can say this without being a pompous jerk because I do not take full credit for my success. I will now explain.

Have you been plagued personally or in your family by dry turkey that needs an unholy smattering of gravy to stomach? Enter Alton Brown. Sweet, sweet Alton...how I love thee. Last year I used Alton Brown's cooking method for roasting a turkey and it was absolutely phenomenal.

However, I did used my own concocted twist on his brine and aromatics.
This year I'm going to do it again but I'm going to try a different brine and gravy method. So, let me tell you how to make the most wonderful turkey in the history of the world.

You begin by getting one of these babies who so graciously give their lives for our stomachs.

Fresh would certainly be preferable but frozen is great too. Frozen does however come with a warning. Do not by any frozen turkey that's been injected with a salt solution or anything of the like. This would be a very bad combo with a brine. Also note that a frozen turkey will take 2-4 days to thaw. Now for the preparation of said turkey lurkey.

Open 'er up and take out the unmentionables. Now if you are like my mother you will save these for a little morsel to snack on later. You can also use it to make a fine gravy and that's just what I'm gonna do so take those nasty things and set them aside...we'll deal with them later. Then give the old bird, ha...a really good rinse inside and out.

Now you're ready for the brine. Alton uses this one...


Brine: (for a 14-16lb turkey)

  • 1/2 cup light brown sugar
  • 1 gallon vegetable stock
  • 1 tablespoon black peppercorns
  • 1 1/2 teaspoons allspice berries
  • 1 1/2 teaspoons chopped candied ginger
  • 1 gallon heavily iced water
Which I used last year with a few changes (which I don't remember of coarse, I kinda fly by the seat of me pants) and it was great. This year I have decided to go with this:

Brine: (for a 20lb turkey)
3 cups Apple Juice
12 cups chicken stock (no or low sodium if using broth!)
5 cloves garlic, minced
1 1/2 cup Kosher salt (careful I'd only do 1 cup if using salted broth)
2 Cups brown sugar
3 tbsp peppercorns
5 whole Bay Leaves
Peel of three large oranges
1 gallon ice water

Now I tell you how large these are because if your turkey is significantly smaller I would take down your salt ratio a bit or scale down the whole recipe.
Okay so when I do my turkey I brine it in a canning pot like this:

It fit my turkey beautifully and already had it. I'm sure it would fit in my fridge but it takes too much room. So since I live in Utah I just give it a once over in saran wrap and put it on my porch...it's usually cold enough.
Another option of coarse are brining bags or just XL plastic bags. If you go this route it may fit nicely in one of your refrigerator drawers and save on space.

To make the brine (most methods are simple and practically the same):
Pour all the ingredients except ice water in a pot and heat until sugar and salt are completely dissolved. Bring to a boil, remove from heat, cover, and let cool. This can be made ahead of time and stored. 12-24 hours before it's time to cook the bird combine the brine, ice water, and turkey in your vessel breast down. Flip it half way in between to be sure it all gets covered.

When it's done brining rinse it in cold water like you have never for rinsed before...inside and out, every nook and cranny, for like 5 minutes. This helps it not be so super duper salty.

Now you are ready to roast. To prep the turkey you need to get it dry, dry, dry so your skin can get crisp, crisp, crisp. Place the turkey in a roasting pan with a rack.

Combine 1/2 an apple, 1/2 an onion, and 1 cup of water in a microwave safe dish and microwave on high for 5 minutes. Add steeped aromatics to the turkey's cavity along with 4 sprigs rosemary and 6 sage leaves. Tuck the wings underneath the bird and coat the skin liberally with canola oil.

Roast the turkey on lowest level of the oven at 500 degrees F for 30 minutes. Insert a probe thermometer into thickest part of the breast and reduce the oven temperature to 350 degrees F. Set the thermometer alarm (if available) to 152 degrees F. A 14 to 16 pound bird should require a total of 2 to 2 1/2 hours of roasting. Let the turkey rest, loosely covered with foil or a large mixing bowl for 15-20 minutes before carving.

Okay, so be prepared for your grandma, mother, and everyone you know to say that your turkey wont be done after only two hours. Pay no attention to the nay sayers behind the curtain! It's all about the temp not the time. Now you may think 152, that doesn't sound hot enough...but there is a little something called carry over cooking which means it keeps cooking even once it's out of the oven. The bigger the bird the more the carry over so...You just want to be sure it comes up to about 165 degrees F before cutting.

Did I miss anything? Did I mention this is going to be the best turkey you've ever made, eaten, or heard of? I implore you to try it.

Please comment with any questions or what you do. And please check back for my gravy, sides, and dessert.


Tuesday, June 29, 2010

Fabulous Flank Steak

I've been requested to post numerous recipes to here's the first of a few. The most simple crowd pleasing flank steak ever.

Flank Steak: (Difficulty-Easy)

Ingredients:

Flank steak

Unseasoned Meat Tenderizer

Teriyaki sauce

Dark Brown Sugar

McCormicks 25% Less Sodium Montreal Steak Seasoning


Place the flank steak in a shallow dish. Sprinkle lightly with meat tenderizer like you would use salt. Cover with teriyaki sauce and let marinade up to 24 hrs. Sprinkle lightly with McCormicks Montreal Steak Seasoning just prior to grilling. Grill for approximately 2 minutes per side over high heat. Move over to medium heat on another side of the grill and go another 3-5 min per side to medium rare. Sprinkle liberally with dark brown sugar.

Let it rest for 5 minutes covered with foil then slice thinly against the grain.

Mmmmmmmm...

Wednesday, January 6, 2010

New Creation

1. Graham Cracker
2. Very thin layer of Peanut Butter
3. Nutella, sweet sweet nutella
4. Thinly sliced Banana
5. Mini Marshmallows, don't scrimp on me here
6. Under the broiler until the desired level of golden brown toasted plumpicity is achieved
7. Just a touch of Caramel drizzled over the top 
8. Napkin
9. Milk

Oh me oh my.....

Saturday, October 17, 2009

Pizza a la Sarah

So the more we eat out the more we decide we should eat home. We pay four times the price and usually leave unimpressed. It started with Indian food. We love, love Indian food. After quite a few trip to the Bombay house (which we were actually happy with but were spending too much on) I thought ummmm, aren't I a chef or something and couldn't I make most of this at home? And so the perfect Indian food, anything comfort food, the perfect steak, and the perfect burger were born. Most recently it's been the quest for fall of the bone BBQ Ribs for Mr. Neilson and

The Perfect Pizza.

So at first I had to perfect the crust, that was the biggest thing. It took me about 4 tries till I was really happy with it. I feel like so much thin pizza I eat the crust ends up a bit soggy bottomed. So that was an issue to solve that took a little science and a pizza stone. I also like a crust that's slightly sweet. Then you have to get the sauce just right. My first attempt was way too watery, sometimes not enough, sometimes too much. I think I'm finally happy with it.


So these are pics of our two best pizzas so far. A Veggie Pizza topped with olives (a must), yellow and green peppers, tomatoes, sauteed mushroom and yellow onion, red onion, and zucchini with Parmesan and a garlic Alfredo sauce. It's pretty good but will probably still take some tweaking.


Then there's the all time favorite, can't go wrong, Margarita pizza which we love.


So we're having fun experimenting and invite you all to come try whatever we're making whenever you want. Next will probably be the perfect peach cobbler because my attempt the other night was pitiful! Anyway, I'll keep you posted.

Sunday, July 12, 2009

Fourth of July

So my "white cake" dessert has become my go-to easy crowd pleasin' treat. It's simply box white cake, with a special whipped topping, and raspberry glazed fruit on top. This time I thought why not make it like a flag for the fourth? So this is my attempt, it proved difficult when the glaze started encroaching on the white stripes and there wasn't enough frosting for the stars (which were a total after thought) so yes I know, it doesn't have any stars. Rob says I don't support the union...

Aaaand I made a fruit tart...mmmmm. (PS-Let me know if you guys are interested in recipes).

Aaaand have the cutest baby in the world. I understand this is an excess of pictures that are quite similar but I couldn't help myself, they were all so adorable.


This is how books are dealt with in the Neilson house. You must first test the significance by tasting the book.

If it passes that test you should fiddle with it for a while and try to tear it apart.

Then, and only then...

do you commence to read.

We had such a fun day at Margaret's eating barbecue and watching fireworks. It was one of Elizabeth's latest nights out...and she was wiped.  All she needed was some quality snuggle time with Hugo and her day was complete. Thanks again Margaret and happy fourth!

Saturday, July 4, 2009

Mmmmm...Best French Onion Soup

~French Onion Soup~

2 ½ lbs Onions
¼ lb Butter
1 Bay Leaf
½ cup Sherry
½ cup Brandy
1 ½ cups White Wine
4 cups Beef Stock
4 cups Chicken Stock
2 cloves Garlic
1 Tbsp Kosher Salt (use less salt if you use salted broth!)
½ tsp White Pepper (regular is okay)
1-2 cups Gruyere
1 loaf French Bread

1. Slice onions ¼ in thick and throw in a sauté pan with butter and bay leaf. Saute about 30 min on medium low until onions are sufficiently golden brown. (Be patient, keep it low and long so they don't burn) Stir frequently!
2. Deglaze with sherry and brandy, let simmer for 5 minutes.
3. Add white wine, let simmer for 5 minutes (I know this all seems like a lot of liquor but trust me, don't substitute and don't scrimp, you wont be sorry).
4. Add stock (this is going to be better if you can actually use stock but broth is okay), garlic, and salt and pepper. Allow to simmer for 20-30 more minutes. The longer the simmer the more flavor the soup and the thicker the soup!
5. Slice French bread and butter lightly. Put in oven under the broiler till it’s golden brown.
6. Ladle up some soup into each dish and top with toast. Add one large handful gruyere over the top and return to the broiler to melt and brown cheese.
7. Eat it eat it eat it!

Serves 4-6 peoples.

Monday, April 6, 2009

Burn 'em up, Move 'em out, Rawhide!

So as some of you may know I've had a difficult time losing my baby weight. Ive tried a few things and finally happened upon something that's been working for me. My friend Aubrey suggested a diet she had done some years ago. It's called The New Beverly Hills Diet, haha! And guess what, it works. Aside from my canker sores and raw mouth from all the pineapple I've been eating there's not a single down side. :) I've lost 12lbs so far and feel great although I'd like to lose about double that.

Now, what's strange is that as I've been on this diet I've actually renewed my love for cooking. This is strange because I can't even eat or try most of the stuff I've been cooking! For some reason I've been obsessed and pouring myself over recipes, trying and tweaking to Rob's delight. I plan for days all of the fun concoctions I want to create. Soy Glazed Salmon, Chicken Madiera, Sarah's amazing burgers, cookies, spicy Moo Goo Gai Pan, muffins, breads, Submarine pasta, etc. So I thought I post one of Rob's favorites up to now.

I made him a glazed salmon with soy sauce, fresh ginger, garlic, and brown sugar. Then I made a mango salsa. Topping it off with sesame rice, asparagus, and wonton strips. It was interesting and Rob said it was the best thing I've ever made him.

Me trying to get a good pic of it...this makes it look messy, I'm really not a photographer. :)
The patronizing "mmmmmm" Rob gave me when I asked him to show me how much he liked it.

Tuesday, October 7, 2008

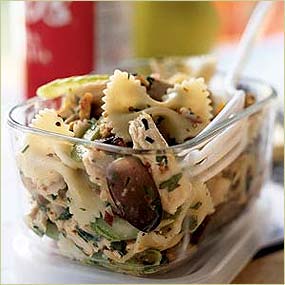
Everybody Loves a Pasta Salad

Quite to the contrary, I had a disdain for all things pasta salad. Everywhere I would go, every relief society function, every open house, I had to eat a pasta salad that was less than desirable. Then my taste buds were enlivened by this very Spinach Spectacular of the mouth. So here it is, one of the now two pasta salads that I like.

16 oz bow tie pasta (cooked al dente, set aside)
2 cups chicken (cook, cube, set aside)
Dressing:
1 cup vegetable oil
2/3 cup teriyaki
2/3 cup white wine vinegar
6 tbsp sugar
1/2 tsp salt
1/2 tsp pepper

Salad:
1, 10 oz bag fresh spinach
6 oz bag craisins
3, 11 oz cans manderin oranges, drained
1/2 cup parsley, chopped
1 bunch green onions, chopped
1/4 cup toasted sesame seeds
6 oz honey roasted peanuts (which I omit because nuts should never be in a salad)
2, 8 oz cans sliced water chestnut (which I also omit because water chestnuts are gross and useless)

To make the dressing combine all ingredients except the oil in a blender. Then slowly drizzle in the oil while the blender is running. You must make it this way or the dressing will separate. Then marinade the cooked pasta and chicken in the dressing for at least 2 hours. I simply do this the night before along with portioning all the salad components. The chicken and pasta have much better flavor and assembly is much quicker the next day! Right before serving toss everything together an eat up! Pasta salad, yummy yummy...and no I don't watch the wiggles.

Thursday, October 2, 2008

La Salsa Es Tan Buena!

Ok, I don't speak spanish so I'm sure that's wrong but mmm salsa IS so good. This recipe is Quick, Easy, and my favorite healthy snack.
1 can black beans, rinsed
1 can white corn, rinsed
1-2 orange bell peppers, small chop
4-5 Roma tomatoes, small chop
1-2 avocados, small chop
1 good size bunch of cilantro, minced
2-4 oz zesty Italian dressing

So this is what I put in it and it is so yummy, but what is so great about salsa is you can really cater it to your taste and what you've got around the house. In fact, I was just thinking how it might taste really great to add red onions...hmmm. I'm going to try it and I'll let you know. Please enjoy this fantastic snack. I'll be posting a new one soon!


Thursday, September 4, 2008

Tastebud Alert.

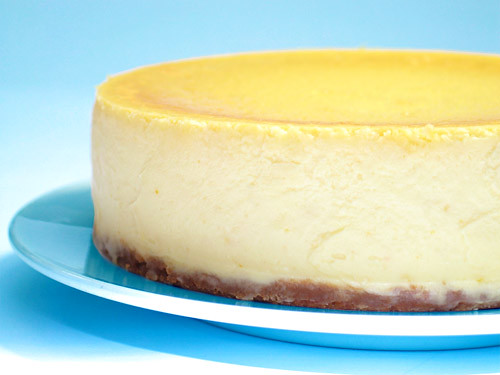
Good ol' fashioned Cheesecake

Crust:

1/4 cup finely chopped pecans
1/4 cup finely chopped walnuts
1/4 cup finely chopped almonds
3/4 cup finely chopped vanilla wafers
2 tablespoons melted butter

Filling:

1 1/2 lbs cream cheese
1 1/3 cups sugar
5 large eggs
16 ounces sour cream
1/4 cup flour
2 teaspoons vanilla extract
2 teaspoons lemon juice

Crust Directions:
1. Mix all nuts and vanilla wafer crumbs with melted butter and press into a 9 inch buttered springform pan, trying to line the sides as much as possible about 1 1/2" up the sides of the pan, set aside.

Cheesecake Directions: (follow precisely or you'll get lumps my dears!)
1. All the filling ingredients should be at room temperature.
2. Beat the cream cheese until light and fluffy with an electric mixer set on low (keep the setting at low during the entire mixing process).
3. Add the sugar a little at a time and continue beating until creamy.
4. Add one egg at a time and beat after each egg.
5. Add flour, vanilla and lemon juice, mix well.
6. Add the sour cream and beat well.
7. Pour cream cheese mixture into the springform pan.
8. Place on the top rack in the middle of a 325 degrees preheated oven for 1 hr and 15 mins.
9. When time is up, prop open oven door and leave in oven for 1 hr.
10. Remove from oven and let cool then refrigerate for 24 hours.
Remember this important tip : A cheesecake should season. The wait is worth it. The flavor ripens and becomes enriched.

BTW Dareth if you wanted cheesecake more on the funky side I have that too.

Good luck to all, bring me samples of your results!

Thursday, August 28, 2008

I wanna walk like you, talk like you...

So everyone's always saying "you have to teach me to cook like you!" So...I'm going to start posting some of my favorite recipes and some I'm trying out. Give 'em a go and give me your feedback. I hope you enjoy!


So this is a family fav. Coffee Cake. And all you mormons out there, no worries, the named is derived from it's most preferred eating companion not what's actually in it! :) So here it is:

Topping:
1/2 c Sugar
1/4 c sifted AP flour
1/4 c softened butter
1 tsp cinnamon

Batter:
1 1/2 c sifted flour
2 1/2 tsp baking powder
1/2 tsp salt
1 egg
3/4 c sugar
1/3 c melted butter
1/2 c milk
1 tsp vanilla extract

1. Preheat the oven to 375 degrees and prepare a well greased 13 x 9 in pan.
2. For the topping, in a small bowl combine dry then add butter and mix with fork just until incorporated.
3. For the cake, sift dry together (flour, salt and baking powder.) Beat egg until frothy, and add in sugar and butter, then add milk and vanilla. Beat in flour slowly until well combine.
4. Spread the topping evenly over the surface of the cake, may need to be gently plopped over cake.
5. Bake for 25-30 min, or until a knife comes out clean. Serves 9

Voila! Easy as pie...err cake. Good luck!